

1. Duplicate the Joker file in Onshape
If you don't yet know how to handle files and variables in Onshape, I have a guide that will help you!
2. Get a digital caliper
You will need to make some really accurate measurements of your camera. You want the Joker to fit just right: it must protect your lens, but it shouldn't obscure your view. A digital caliper could be very useful for these.
3. Familiarize yourself with your camera
Your camera will probably look something like this BeeEye.
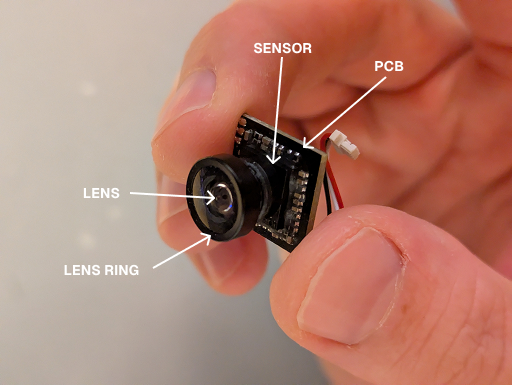
The lens (glass or plastic) is surrounded by the black plastic lens ring.
Under the lens ring, there is a narrower cylinder that connects it to a rectangular cuboid part, which houses the sensor. We will call this part the sensor.
At the bottom is a printed circuit board, or PCB, that probably has a bunch of surface-mounted electrical components on it.
4. Measure the diameter of the lens
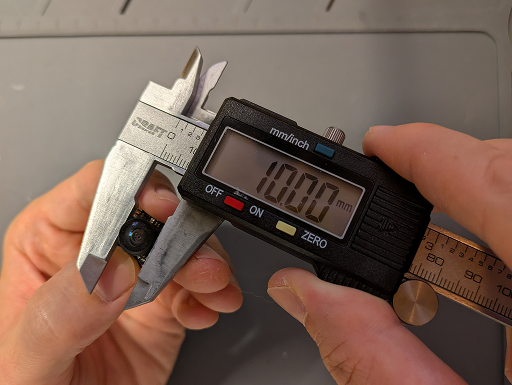
Input this into the variable LensDiameter.
5. Measure the side of the sensor
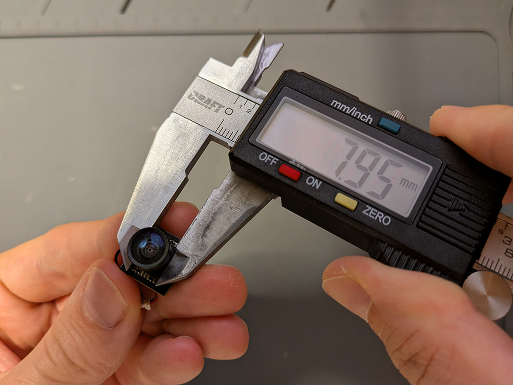
Input this into the variable SensorSquareSide.
6. Measure the distance between the lens ring and the PCB
Or, to be more exact, from the end of the plastic outside part of the lens ring, to where the first PCB components start.
The photo for this is not perfect, but it might help.
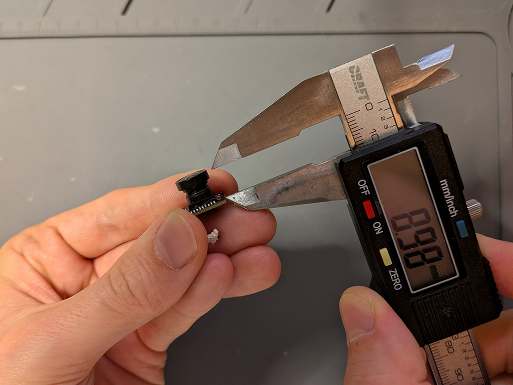
This goes into the variable LensPCBDistance.
7. Adjust CamLegHoleDistanceY
This part is a bit trickier. You need to adjust the variable CamLegHoleDistanceY so that after printing and assembling, the camera sits about 1mm forward from the screw.
The value you'll need to use depends on the camera's PCB height, and the material you're using.
In my experience, this is best achieved with trial and error.
8. Adjust LoopSizeY, or remove the camera loop
The goal of the camera loop is to stop the camera from popping out of the lens ring in frontal crashes. You need to adjust its length so that it just fits tightly onto the little hooks on the center leg.
This depends on the camera's PCB height and depth, plus the material you're using.
Some cameras have their wires in such an awkward position that a cam loop can't be used. In this case, right click the cam loop in the Features panel and supress it.
9. Print and check the fit
Now you're ready to print your Joker.
Once it's done, check the following:
- Does the lens ring part fit tightly? This is crucial: you don't want the camera to move around.
- Does the lens ring part line up perfectly with the camera's lens ring? If it's too forward, the spikes might obscure the view. If it's too far back, the lens will not be protected by them.
- When you put everything together, is there enough space between the camera and the front AIO screw? You want about 1mm of space there, to make sure the camera doesn't hit the screw in a crash.
- Does the cam loop fit tightly, so that it can keep the camera secure?
10. Share your results!
Other people might also be interested in your Joker variant! If you have achieved a good fit, please send me some pictures of it. I might even make it part of the official Joker build (and feature you as a contributor)!
Any questions?
Ask around in the Tressym Discord, DM me, or send me an email!